
The fastest Windows on XCP-ng is the one you don’t install

Photo by Jens Lelie on Unsplash.
I needed a Windows box on XCP-ng for a side project, and I did the obvious thing first. I tried to install it.
That was a mistake, and it took me the better part of two days to admit it.
If you have ever fed a Windows ISO to an XCP-ng VM, you know the wall. Windows Setup boots, you click through the language screen, and then it stops dead on "A media driver your computer needs is missing." XCP-ng hands the VM its disk over the Xen paravirtual block bus, which shows up inside the guest as xvda, and the WinPE environment that drives Setup has never heard of it. It is the same situation as installing Windows on Proxmox or plain KVM without the VirtIO drivers loaded. The disk is right there, the installer just cannot see it, so the "where do you want to install Windows" screen is empty and "Next" stays greyed out.
On Proxmox you click "Load driver", point at the VirtIO floppy, and move on. On XCP-ng the equivalent storage driver (xenvbd, plus its bus parent xenbus) only ships inside the guest tools MSI, so getting it in front of WinPE is more work. Here is the short version of what I went through, because it is the reason the rest of this post exists.
I extracted the PV drivers out of XenTools-x64.msi with msitools on a Linux box, dropped them into a $WinPEDriver$ folder so WinPE would auto-load them at boot, and built a remastered install ISO. Then I learned that Windows ISOs store their payload in UDF, so the usual xorriso "add a file" trick copies almost nothing forward. So I did a full extract with 7z, injected the drivers, and rebuilt a dual BIOS and UEFI bootable ISO. Then I learned that WinPE’s ISO9660 driver cannot read a file larger than 4 GB, and the install.wim is 5.8 GB, which is exactly why Microsoft uses UDF in the first place. So I split the WIM with wimsplit into chunks under 4 GB. And because the VM is headless, I had to catch the "Press any key to boot from CD" prompt by spamming keystrokes at the firmware over QMP, since there is no keyboard at the firmware screen to press.
I got it working. The disk finally appeared, Setup ran, and then the fresh install bricked into Automatic Repair on first boot. At that point I stopped and asked myself the question I should have asked at the start.
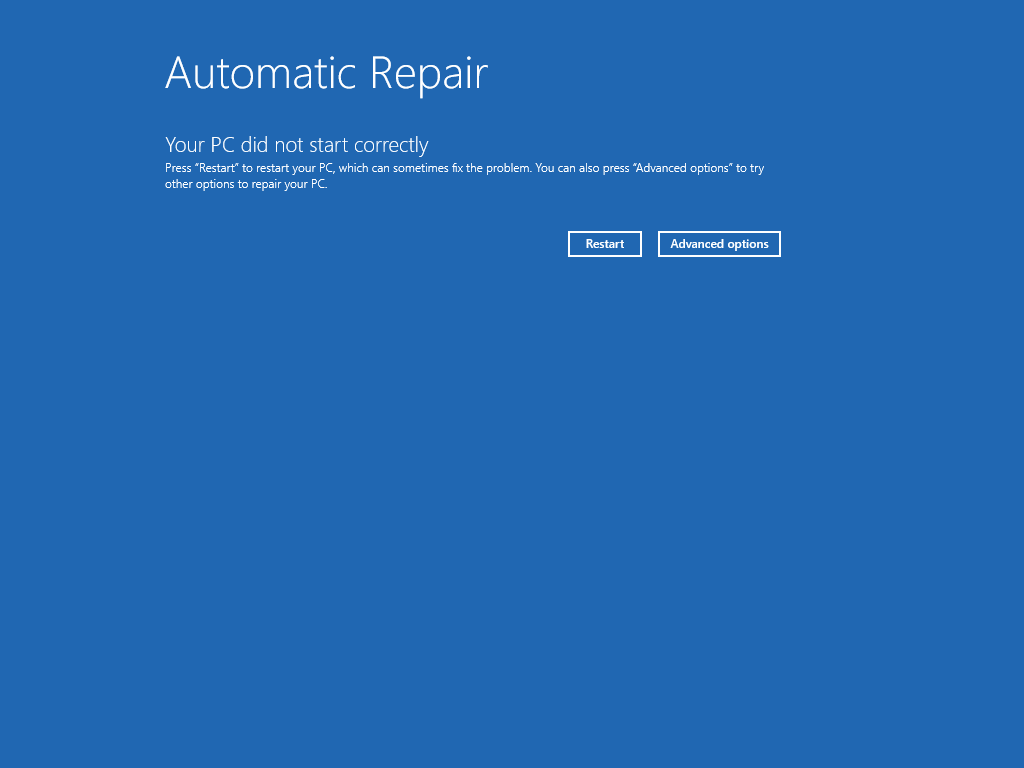
Figure 1. How the from-scratch install ended: a fresh Windows 11 stuck in Automatic Repair on first boot.
Why am I installing Windows at all?
Microsoft hands you a finished disk
The Microsoft Evaluation Center publishes Windows Server as a ready-made VHD, sitting right there next to the ISO. It is a sysprepped, fully installed copy of Windows on a virtual disk. No Setup, no driver injection, no keystroke roulette at a firmware prompt. You attach the disk to a VM, power it on, answer a couple of out-of-box questions, set a password, and you are looking at a desktop.
Two caveats before you reach for it, because they matter and I would rather you hear them now than after you have built something on top.
It is Windows Server, not a client edition like Windows 11. For a lab, a proof of concept, or anything where you just need a Windows userland to run something, that is fine, and Server even comes with the Desktop Experience so it looks and feels like a normal Windows. If you specifically need client Windows, this is not your image.
It is an evaluation image. The licence runs 180 days, and you are expected to activate it online within the first 10 or it starts shutting itself down on a timer. For a throwaway lab box, that is a feature: it cleans up after itself. For anything you mean to keep, plan to activate it or treat it as disposable.
Mine was the Datacenter evaluation, build 26100. Here is the whole recipe.
Step 1: grab the VHD, not the ISO
From the Evaluation Center, pick Windows Server 2025 and look for the VHD download rather than the ISO. Fill in the short form, and you get a roughly 11 GB .vhdx file. That file is the entire point: it is Windows already installed, captured as a disk image, waiting to be dropped onto a hypervisor.
Step 2: convert it, but not on dom0
xe vdi-import understands raw and VHD, but not the newer VHDX container, so the file needs converting first. qemu-img does that in one line. My instinct was to run it on the XCP-ng host itself, since that is where the disk is going anyway.
Do not do that. The way it fails is nasty, because it fails quietly. The qemu-img that ships in dom0 is a stripped-down build that only knows raw and qcow2. Point it at a VHDX and, in my case, it did not error out and tell me it could not read the format. It mis-detected the file as raw, reported the virtual size as equal to the file size (which is nonsense for a dynamic VHDX), and any conversion on top of that produces garbage. You will not find out until much later, when the VM refuses to boot, and you will not know why.
So convert on a normal machine that has a full qemu-img. Any modern Linux distribution has one; my WSL2 box was fine. A current qemu-img reads the VHDX correctly and reports the real geometry: a 64 GiB virtual disk with about 11 GB of actual data inside it.
qemu-img convert -f vhdx -O vpc -o subformat=dynamic ws2025.vhdx ws2025.vhdThe -O vpc is the VHD output format (the name is a leftover from Virtual PC), and subformat=dynamic keeps it thin, so you end up with a compact dynamic VHD that is about 11 GB on disk despite presenting a 64 GiB drive to the VM.
Step 3: import the disk
Copy the converted VHD over to the host. It does not need to live on dom0’s root partition, which is usually tiny: put it on the storage repository mount, which has the room. Then create a VDI sized to match the disk’s virtual size exactly, and import the file into it.
That virtual size is not the round 64 GiB you would expect, and this bit me. When qemu-img writes a dynamic VHD it rounds the virtual size up to the nearest CHS (cylinder, head, sector) geometry boundary, so a nominal 64 GiB disk comes out as 68720517120 bytes, not the arithmetic 68719476736. The VDI has to match the VHD exactly, or be larger, or vdi-import rejects it for being too small. So give vdi-create the rounded number that qemu-img actually produced:
xe vdi-create sr-uuid=<SR> name-label=ws2025 virtual-size=68720517120 type=user
xe vdi-import uuid=<VDI> filename=/run/sr-mount/<SR>/ws2025.vhd format=vhd
The import returns 0 and looks, frankly, like it did nothing. Here is the trap: do not trust the physical-utilisation field to confirm the data landed. On a thin (ext) storage repository it lied to me, reading about 135 KiB while 11 GB of Windows sat on the disk. It is the same unreliable metric that had me staring at "0 MiB" mid-install during the from-scratch saga.
The ground truth is the backing file on disk. Run an sr-scan, then look at the actual .vhd the SR created for your VDI:
du -h /run/sr-mount/<SR>/<VDI>.vhd # should report about 11 GIf that reads roughly 11 G, the import worked, whatever the xe metric tells you.
Step 4: make the VM UEFI, not BIOS
This is the gotcha that cost me the most time, and it cost me time because the internet lied to me with great confidence. Page after page describes the Windows Server evaluation "VHD" as a Generation 1 image, which in Hyper-V terms means BIOS firmware and an MBR partition table. So I dutifully built a BIOS VM, attached the disk, set it to boot, and started it.
The firmware found the disk. It listed it as "XS Virtual IDE Controller, Hard Drive 64 GB", printed "Boot device: Hard Disk, success", and then sat there. Forever. No error, no spinner, just a cursor and silence.
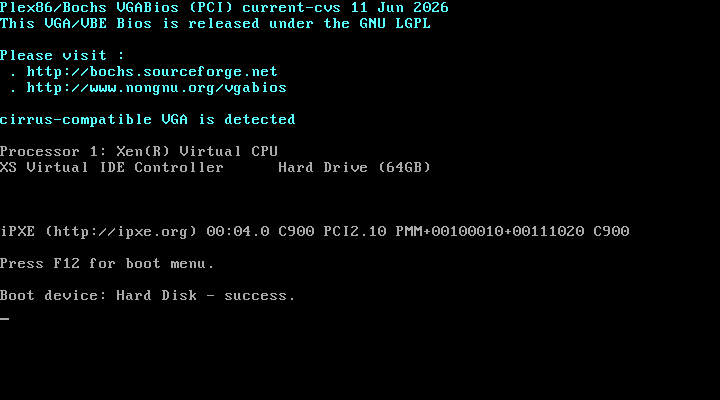
Figure 2. The BIOS VM finds the disk and reports "Boot device: Hard Disk, success", then hangs. There is no MBR boot code on a GPT disk for it to run.
The image is not Generation 1. For build 26100 it is GPT and UEFI, and you can prove it to yourself in about thirty seconds by looking at the first sectors of the converted VHD. You will find a protective MBR (a single partition entry of type 0xEE, which is GPT’s way of telling old tools "this whole disk is taken, hands off"), and the literal string EFI PART sitting at LBA 1, which is the GPT header signature. A BIOS VM finds the disk, looks at the MBR for boot code to run, finds only the protective stub, and has nothing to execute. Hence the polite hang.
The fix is two lines. Build the VM from the "Other install media" template (so XCP-ng does not impose an OS-specific default), then flip it to UEFI and turn off Secure Boot. Secure Boot needs Microsoft’s UEFI certificates enrolled in the pool (that is what secureboot-certs install sets up), and a fresh XCP-ng 8.3 pool does not ship them by default, so a Secure Boot guest has nothing to validate its signed bootloader against until you enroll them. Turning it off is the no-friction path to a booted desktop:
xe vm-param-set uuid=<VM> HVM-boot-params:firmware=uefi
xe vm-param-set uuid=<VM> platform:secureboot=false
Or, if you would rather keep Secure Boot on, you can, as long as the pool has the certificates. You enroll them once per pool with a single command, and from then on every UEFI guest can use Secure Boot:
secureboot-certs installThat fetches the standard Microsoft PK, KEK, db and dbx certificates and stores them at the pool level. Check what a pool already holds with secureboot-certs report; on the pool I tested, all four were already in place, so there was nothing to install. Then build the VM exactly as above, but flip the switch the other way:
xe vm-param-set uuid=<VM> HVM-boot-params:firmware=uefi
xe vm-param-set uuid=<VM> platform:secureboot=true
The evaluation disk boots with Secure Boot enforcing, because its bootloader is signed by Microsoft and the pool now holds the certificate that vouches for it. To prove it landed rather than take my word for it, open a shell in the guest and ask Windows directly:
Confirm-SecureBootUEFITrue means Secure Boot is on and enforcing. On my Windows Server 2025 build 26100 it came back True on the first boot, with the UEFI SetupMode variable reading 0, which is the firmware’s way of saying the keys are enrolled and it is checking signatures for real.
One version caveat, because this leans on the host package behaving. Confirm your dom0 is not running the withdrawn varstored 1.2.0-3.1, which mishandled certificate enrollment; check with rpm -q varstored. The pool I tested was on varstored 1.3.2-2.1 (XCP-ng 8.3), where it works cleanly.
Attach the imported VDI as the bootable disk, give the VM a network interface, set the boot order to disk, and start it.
First boot runs the usual sysprep "Getting ready" dance and reboots itself once partway through, while Windows specializes the image for this particular VM. Be patient here. The console is painfully slow while that happens, and that is a consequence of how we built this VM rather than something XCP-ng does to every guest. A VM created from the "Other install media" template has no vga key in its platform map, and with that key unset qemu hands the HVM guest an emulated Cirrus adapter with 4 MB of video memory. "Getting ready" can take close to ten minutes on it, and it looks identical to a hang. The Windows templates set vga: std and videoram: 8 instead. Hold that thought, because the same template choice is about to cost us something bigger. If you want reassurance that it is actually working and not stuck, check xentop on the host: a VM that is busy specializing is burning CPU, a hung one is not. After the reboot you land at the out-of-box screens. The US region and keyboard defaults are fine to accept, then you set the built-in Administrator password, and you are at a Windows desktop.
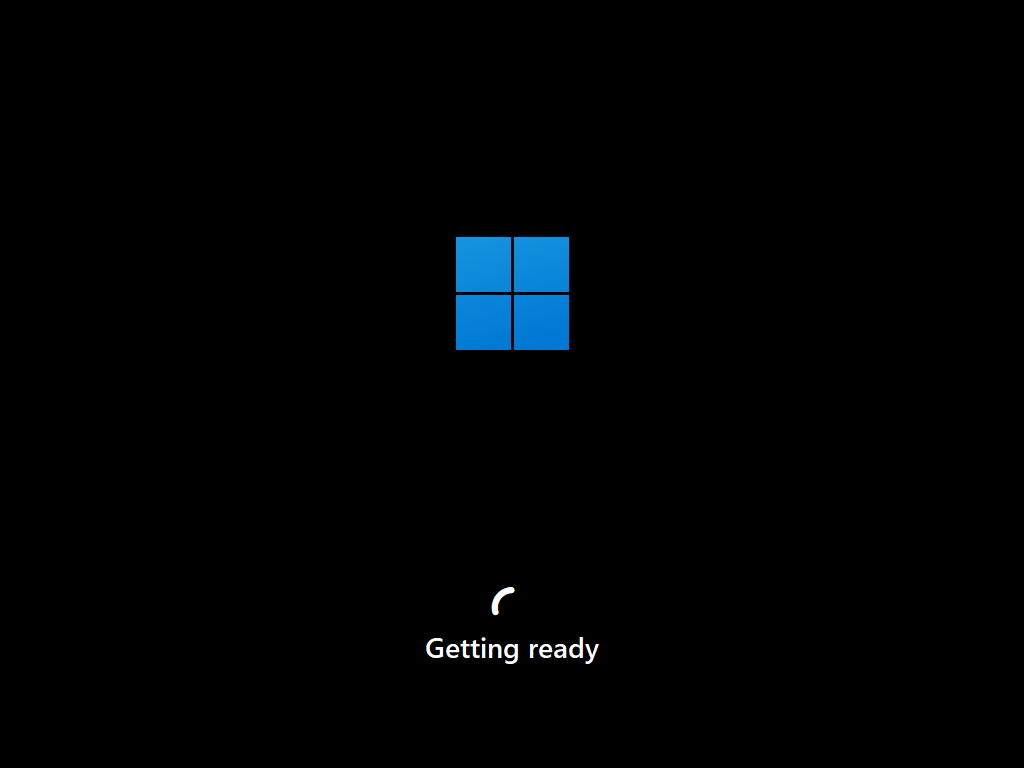
Figure 3. With firmware set to UEFI, the imported disk boots: Windows Server 2025 specializing on first run.
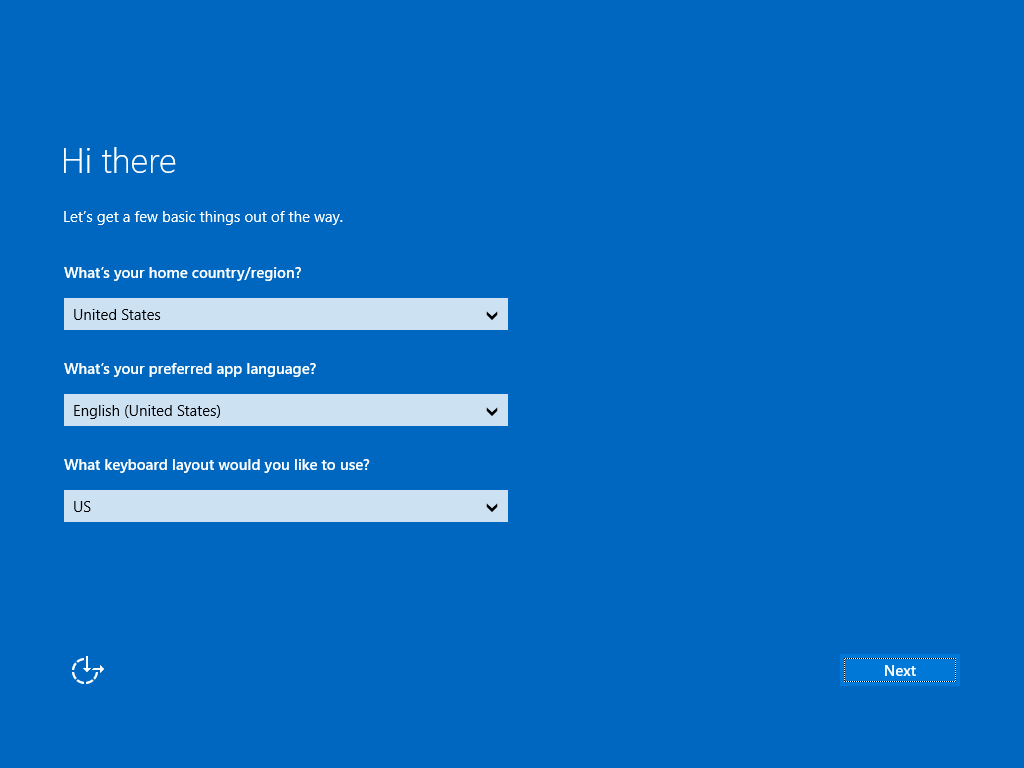
Figure 4. Out-of-box setup, region and keyboard. No installer ran to get here, only an imported disk.
One pleasant surprise: the network just works, before you have installed a single paravirtual driver. Windows Server 2025 has an inbox driver for the emulated NIC that XCP-ng presents, so the VM picked up a DHCP lease (and even a public IPv6 address) the moment it reached the desktop. RDP and SSH were reachable immediately. I enabled the in-box OpenSSH server so I could drive the machine from a real shell instead of squinting at a slow VNC console:
Add-WindowsCapability -Online -Name OpenSSH.Server~~~~0.0.1.0
Start-Service sshd
Set-Service -Name sshd -StartupType Automatic
After the from-scratch ordeal, where every keystroke went through a flaky console bridge, having a plain SSH prompt into Windows felt like a small miracle.
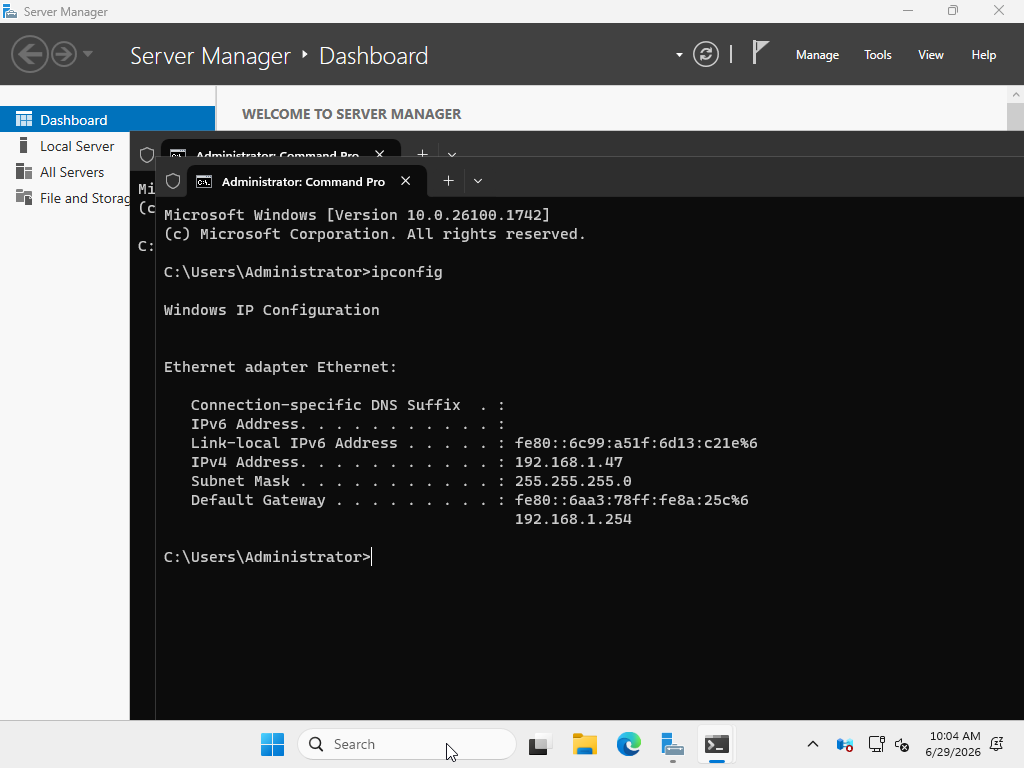
Figure 5. The emulated network card has an inbox driver, so the VM pulls a DHCP lease on first boot, before any paravirtual drivers are installed.
The flags that template did not set
Added after publication, because a colleague’s support question sent me back to look at my own VM.
Building from "Other install media" is the right call for getting this disk to boot, and it has a cost I did not notice at the time. That template is deliberately generic, so it does not apply the Viridian settings that the Windows templates do. Viridian is the platform’s name for the Hyper-V enlightenments Windows expects to find, and the documentation is blunt about it: all six parameters should be true for proper operation of Windows.
Put the two templates side by side and the gap is obvious:
xe template-param-get uuid=<Windows Server 2025 template> param-name=platform
xe template-param-get uuid=<Other install media template> param-name=platform
The Windows Server 2025 template sets all six. "Other install media" sets viridian: true and stops there. My imported VM inherited the short version, so it had been running on one flag out of six the whole time.
It is not only Viridian. Put the two platform maps side by side and the Windows template also sets vga: std and videoram: 8, which is the slow console from earlier in this post. One template choice, three defaults you do not get.
Check yours:
xe vm-param-get uuid=<VM> param-name=platformIf any of viridian, viridian_time_ref_count, viridian_reference_tsc, viridian_apic_assist, viridian_crash_ctl or viridian_stimer is missing, or present and set to false, set them with the VM shut down:
xe vm-param-set \
  uuid=<VM> \
  platform:viridian=true \
  platform:viridian_time_ref_count=true \
  platform:viridian_reference_tsc=true \
  platform:viridian_apic_assist=true \
  platform:viridian_crash_ctl=true \
  platform:viridian_stimer=true
I did measure it in the end, because a claim like this is worth more than a shrug. Same VM, same host, the other four VMs on that host shut down. diskspd 2.2, five iterations of each of these:
diskspd.exe -c2G -d25 -W10 -b4K -r -o1 -t1 -Sh -L -w0 C:\bench\test.dat
diskspd.exe -c2G -d20 -W5 -b4K -r -o8 -t4 -Sh -L -w0 C:\bench\test.dat
-Sh turns off Windows-side caching for that file. It does nothing about the layers below the guest, and neither did I, which matters further down. I measured at one flag, flipped to six, went back to one, then back to six, so that a reboot could not quietly take the credit. The first iteration of every run is discarded, because it reads off a warm cache and flatters whichever configuration happens to go first. That is not a theoretical worry: on the queue-depth-1 test the discarded iteration came back at 28.8 MiB/s, against 10.4 to 13.4 for the rest of the run.
4K random read, medians of eight measurements per group:
| 4K random read | 1 of 6 flags | 6 of 6 flags |
|---|---|---|
Queue depth 1, average latency | 0.312 ms | 0.195 ms |
Queue depth 1, IOPS | 3,143 | 5,127 |
Queue depth 8 across 4 threads, IOPS | 45,147 | 71,674 |
The two groups did not overlap, and the run-to-run spread went from roughly a quarter to a few percent.
Then the honest part, because I would rather nobody changed a production VM on the strength of my afternoon. I flipped five flags at once, so I cannot tell you which one matters, or whether it is one of them or all five together. I cannot explain the mechanism either. I have no good story for why timer and APIC enlightenments would move 4K random read throughput this far, and I can invent one about reducing VM exits, but inventing one is precisely what I am trying to avoid here. It is also possible I measured something that merely correlates with the config change rather than the flags themselves.
Add to that one VM, one host, and local disks rather than iSCSI or NFS. One of the four runs drifted upward partway through in a way that looks like host caching, which is exactly the layer I never controlled, and which is why the table gives medians and no percentages at all. Please do not quote these as a general figure, and if you know why the difference is this large, I would rather hear it than keep guessing.
What I am confident about is the first half of this section, because it is only reading template parameters back. A VM built this way gets one flag instead of six, and putting the other five back is cheap.
The documentation attributes a harder failure to the same missing synthetic timer: a Windows Server 2025 guest hangs randomly at 0% CPU. The flags are the first thing that page tells you to check, and they only cover the host side of it. If you have ever set Windows boot parameters to disable the synthetic timer, those have to come back out too:
bcdedit /deletevalue "{current}" useplatformclock
bcdedit /deletevalue "{current}" useplatformtick
That wants an elevated prompt, and it wants a reboot: the BCD store is read at boot and nowhere else, so nothing changes until the guest comes back up.
The same gap catches anything that did not come from a Windows template, such as a VM imported from a VHD like this one. Migrating in from VMware is less clear-cut than I first assumed: the documentation says Viridian "is also enabled on V2V-migrated and Packer-created VMs if using the correct templates", so the outcome depends on what the migration landed on. I have not run a V2V import myself, so read the platform map rather than assuming it either way.
Step 5: the guest tools, and the one real trap
The emulated NIC works, but you still want the XCP-ng guest tools. They bring the paravirtual network and storage drivers (xennet and xenvbd), which are faster than the emulated devices, and the management agent that reports the guest’s IP back to the host so XAPI and Xen Orchestra can show you where the VM actually is on the network. Installing them is where the one true footgun of this whole exercise lives, so slow down for this part.
There is a VM setting called has-vendor-device. The name sounds like exactly what you would want on: something for the PV drivers to bind to. That intuition is precisely wrong. I turned it on, rebooted with the network up, and Windows Update quietly reached out and installed Citrix’s PV drivers underneath me, without asking. Because has-vendor-device=true is not "let the PV drivers bind". It is the "Manage Citrix PV drivers via Windows Update" feature. Flip it on, give Windows a network, and Update treats that as permission to manage your Xen drivers for you.
In my case they installed broken. The bus driver came up, but its children sat in an error state, so the NIC never moved off the emulated device anyway. Worse, the XCP-ng XenTools-x64.msi then refused to install at all. It checks for exactly this situation, found the Citrix drivers already present, threw "incompatible devices found", and exited 1603. So the helpful Windows Update behaviour had locked me out of the supported tools.
The supported path, straight from the XCP-ng docs, is the opposite of what the setting’s name suggests:
Leave
has-vendor-deviceset to false. That is the expected, documented state for XCP-ng’s own tools. The PV drivers bind to the always-present base Xen platform device regardless; the vendor device is only the Windows Update trigger, and you do not want that trigger pulled.If Windows Update already grabbed the Citrix drivers (as mine had), run
XenClean.exefrom the guest tools CD as administrator. It rips out the Citrix drivers and reboots itself, no Safe Mode gymnastics required.Then run
XenTools-x64.msi.
After XenClean, the tools install, and one reboot later every xen* device came up clean in Device Manager, the NIC switched over to the "XCP-ng PV Network Device", and the host started reporting the guest’s IP. The PV driver version was 9.1.200.0, the current release when I tested. Done.
One component in that package is worth calling out separately if your VM is UEFI, which this one is: the XCP-ng Standard VGA Display Driver. The documentation says a UEFI VM needs it before Windows screen resolution can be changed from inside the OS at all, which is a fair description of the console I have grumbled about twice in this post. Whether it also shortens the "Getting ready" wait I have not measured, so treat that as the docs' claim about resolution and nothing more.
The one-line takeaway, because it is the line I wish I had read first: leave has-vendor-device off, and let XCP-ng’s MSI install the drivers. Turning it on hands your driver management to Windows Update and Citrix, and breaks the supported path.
The payoff
From a downloaded VHD to a running, networked, paravirtualised Windows Server, with the disk saved for reuse, took me well under an hour the second time around. Compare that with the day and a half I burned teaching the installer to find its own disk, only to watch the result brick on first boot. When the platform already hands you a finished disk image, importing it beats installing.
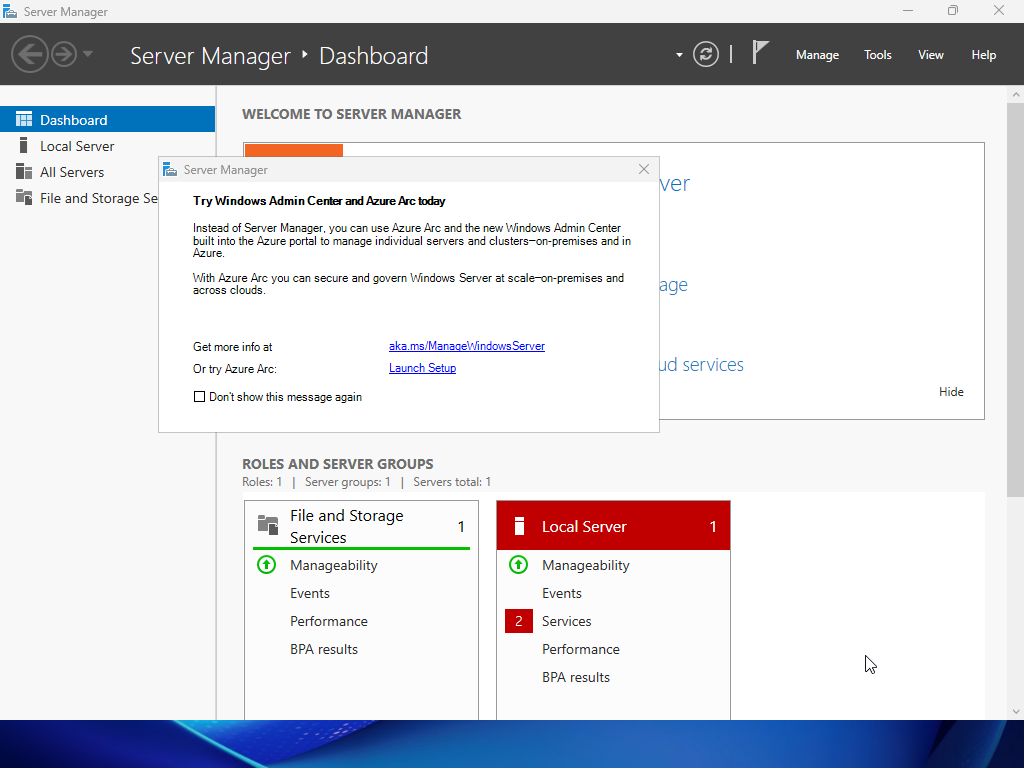
Figure 6. The payoff: a full Windows Server desktop on XCP-ng, and the installer never ran once.
I keep the converted VHD in a small image library now, with a plain text file next to it listing these exact steps. Next time I need a throwaway Windows on XCP-ng, it is a copy and an import away, and the hard part is already done.
As for why I wanted a Windows VM on XCP-ng in the first place, that involves an Intel iGPU, GPU passthrough, and a hardware video encoder that only exists on the Windows side of the fence. But that is a story for the next post.