🍊 ARM your continuous integration system with fruits! 🍌

Summary
The goal of this howto is to show you how to add your own ARM Gitlab runner to your Gitlab instance Runners herd.

Whaaaaaaaaaat?
Ok, let me introduce quickly the concepts.
[TOC]
Continuous integration with Gitlab
Continuous integration allows the developers on a project to check that each change they made did not introduce any regression. Each commit will be followed by a build of their application, and by a run of their test suite. If every test runs still the same way after the commit, then all is fine. Gitlab is a web-based Git repository manager (with tons of features). You can use it directly online, install your own community-edition copy, or pay for top level support.
Today, we’ll be only interested in their continuous integration feature.

Starting Continuous Integration (i.e. CI) is really straightforward with Gitlab. Just create a .gitlab-ci.yml file in your repository hosted in Gitlab, populate it with the commands needed to build your application, and you’re good to go! 🎉
But wait… Where does that build and test execute? That’s where the runners enter.
Runners are machines linked to Gitlab that will execute the builds. These can be real machines, virtual machines or containers. By default, you have access to shared runners on gitlab.com , or even on your company Gitlab instance.
These runners are tagged (🏷️) so that you can also tag your builds accordingly. If you need a runner that will build a Docker image, it could be tagged docker for example, and so would be your build step in your .gitlab.ymlfile.
Your builds can now easily be customized without ruining your own machine configuration… and even use Docker.
Why would you add a 🏃?
If you are using the main Gitlab shared instance, chances are that you will have to be patient to get the results of your build. The Shared Runner concept is really cool, as it allows to share the load, but … you’re not alone waiting in that queue… And the same could be true for your company’s Gitlab instance, as it will soon become popular. So you could add your own machine to the Gitlab Runners herd, just for your project. Pretty neat if you’re tired to wait for other people builds to finish. The problem is a new machine is not cheap. That’s way cool to have your own Gitlab Runner running in your office, but have a quick look at your pockets contents. Do you have enough cash to buy a new machine? Maybe not… But wait… In the introduction, I was talking about ARM Runners. Why would you need to add an ARM processor machine as a Gitlab Runner?

The reason why I chose to install an ARM Gitlab Runner
Well, if your code does not depend on a specific family of processors, there is no other cheaper alternative to build a new Gitlab Runner.
$15 for an OrangePi Zero machine able to run Docker and Gitlab Runner can’t be beaten. And… if you want to develop for that kind of architecture (ARMV7, aarch64…), you will need that kind of runner. I am trying to port software to the ARM processor, and these ARM Gitlab Runners have proven to be really useful. I can develop on my favorite IDE (on a X86 machine for example), commit, and automagically, my modified code will be compiled and tested on an ARM machine. I have to admit all of this could also be done with X86 Runners, as QEMU is able to emulate ARM processors. And even the build of ARM Docker image can be done on X86 Gitlab Runners, thanks to the amazing work of guys at Balena.

But where’s the fun? And furthermore… We all have a Raspberry Pi taking layer after layer of dust. Who has not been bored after having his first led blink? Why not put it back to work?
Let’s go then for a cheap and fun solution.
Choose your preferred fruit
In this article, we’re not going to install Gitlab Runner on a 🍊 Pi, but on a Raspberry Pi (because we had one laying around), but this should work on any fruit (aka ARM Docker capable device), as 🍌 or 🍊.

 Pi M1, courtesy of [Armbian](https://www.armbian.com/bananapi/)](../assets/images/2021/02/04/bananapi.png)
This version of Gitlab Runner we’ll use needs Docker, that’s why we need a Linux distribution which supports Docker.
We’re using an Hypriot distro because of the Raspberry Pi. We could have used Raspbian, but HypriotOS is the best Docker-oriented distribution for the Raspberry Pi. From downloading the image to the first docker command will take only five minutes.

There is also a 64bits fork (as lots of Raspberry Pi distributions are not available for 64bits, that’s a nice plus). To me, that’s the first choice if you want to use Docker on a Raspberry Pi out of the box.
For all other devices, prefer Armbian if supported (like the Orange Pi Zero that can run as a Gitlab Runner too). It’s really easy to install Docker on this distribution.
First of all, let’s download the latest Hypriot distro.
Downloading and installing the Hypriot Distro
Go to the Hypriot download page and choose the latest distro.
- Current image available on 02/04/2021 is Version 1.12.3 : https://github.com/hypriot/image-builder-rpi/releases/download/v1.12.3/hypriotos-rpi-v1.12.3.img.zip
On Windows
Next go to your Download folder and extract the downloaded zip file by right-clicking on the file and then clicking on 7-zip -> extract here…. if you use 7-zip. Whatever your unzipping tool may be, right-click and choose the right option to uncompress the file.
After 7-zip is finished with extracting you will have a file with a .img extension.
On OsX
It’s almost the same as for Windows, except that the tool could be Keka.
On Linux
Just use 7z.
Writing the image
In the next step we will flash this file onto your SD card. We have to use the finest piece of sofware able to write CORRECTLY and CHECK the written image (i.e. Etcher) on any platform. Current version is 1.4.4.
- Windows: https://github.com/balena-io/etcher/releases/download/v1.5.116/balenaEtcher-Setup-1.5.116.exe?d_id=175dc868ae93-02925a057a102f-1a327340-1fa400-175dc868aea1d0
- osX: https://github.com/balena-io/etcher/releases/download/v1.5.116/balenaEtcher-1.5.116.dmg?d_id=175dc868ae93-02925a057a102f-1a327340-1fa400-175dc868aea1d0
- Linux: https://github.com/balena-io/etcher/releases/download/v1.5.116/balena-etcher-electron-1.5.116-linux-x64.zip?d_id=175dc868ae93-02925a057a102f-1a327340-1fa400-175dc868aea1d0
Too bad it does not exist for armv7. I do insist on the use of Etcher, because lots of supposed Linux bugs are because of a badly written image, or to a faulty SDCard. Etcher will take care of these issues. If possible, do not use any USB Dongle or gizmo to host the SDCard, prefer your laptop own SDCard reader. And for the SDCard, prefer a REAL and GENUINE SDCard.
How can you differentiate a real one from a bad copy? Well, you can’t, or not easily… Anyway, unzip the image, and write it with Etcher to your SDCard. In the latests versions of Etcher, you don’t even need to unzip the image file beforehand.
Upon completion, close Etcher and eject the SD card before removing it from its slot. In order to eject the SD card, use the secure eject function in the menu next to your system clock. This is usually in the very bottom right corner of your screen.

Now it’s time to start your Raspberry Pi with the SD card
Boot your Raspberry Pi
- Connect the Raspberry Pi to your local network via an Ethernet cable
- put the SD card into the designated slot
- plug in the power adapter
After finishing the last step your Raspberry Pi will boot and the LEDs should start blinking. The very first boot will take one to three minutes as the file system will be resized.
Find its IP on the network
After booting, you can find the Raspberry Pi at your network with a simple ping black-pearl.local — no more searching for IP addresses required thanks to the integrated Avahi service discovery.

As you can see in the following ifconfig command, the MAC Address of the Raspberry always starts with B8. That could prove useful if ever this first method does not work.

https://gist.githubusercontent.com/gounthar/ceb2680f38e613289f4e55b9e8c4f819/raw/0e7888a483783a92eba88f5d1f9996a47b54cea3/ifconfig.txt
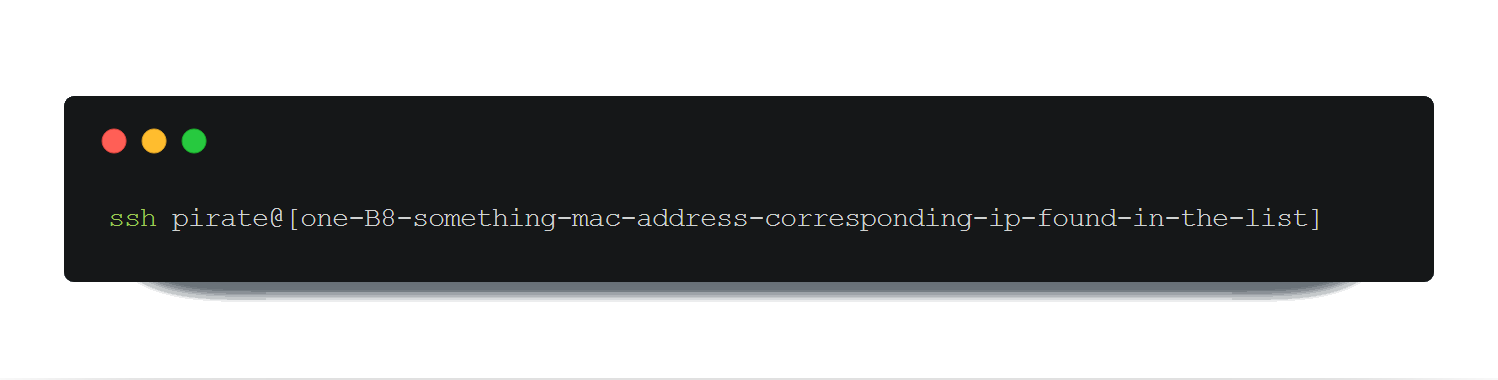
So, what shall we do if the very first ping/ssh does not work with black-pearl? Well, as the Raspberry Pis MAC Address always start with B8 we can use nmap and keep only the IPs whose attached MAC Address sport a B8(yes, it’s gross).
If your network starts at 10.XX.30.XX and ends at 10.XX.50.XX, ip_start would be 30 and ip_end would be 50.

https://gist.githubusercontent.com/gounthar/2b4372abd7a623f7cf670575a76026d1/raw/e27c56e792fdf73652b4b53d07fa6bb91df1b7c7/nmap.txt
This will give you a list of Raspberry IPs on which you will then be able to try to connect with
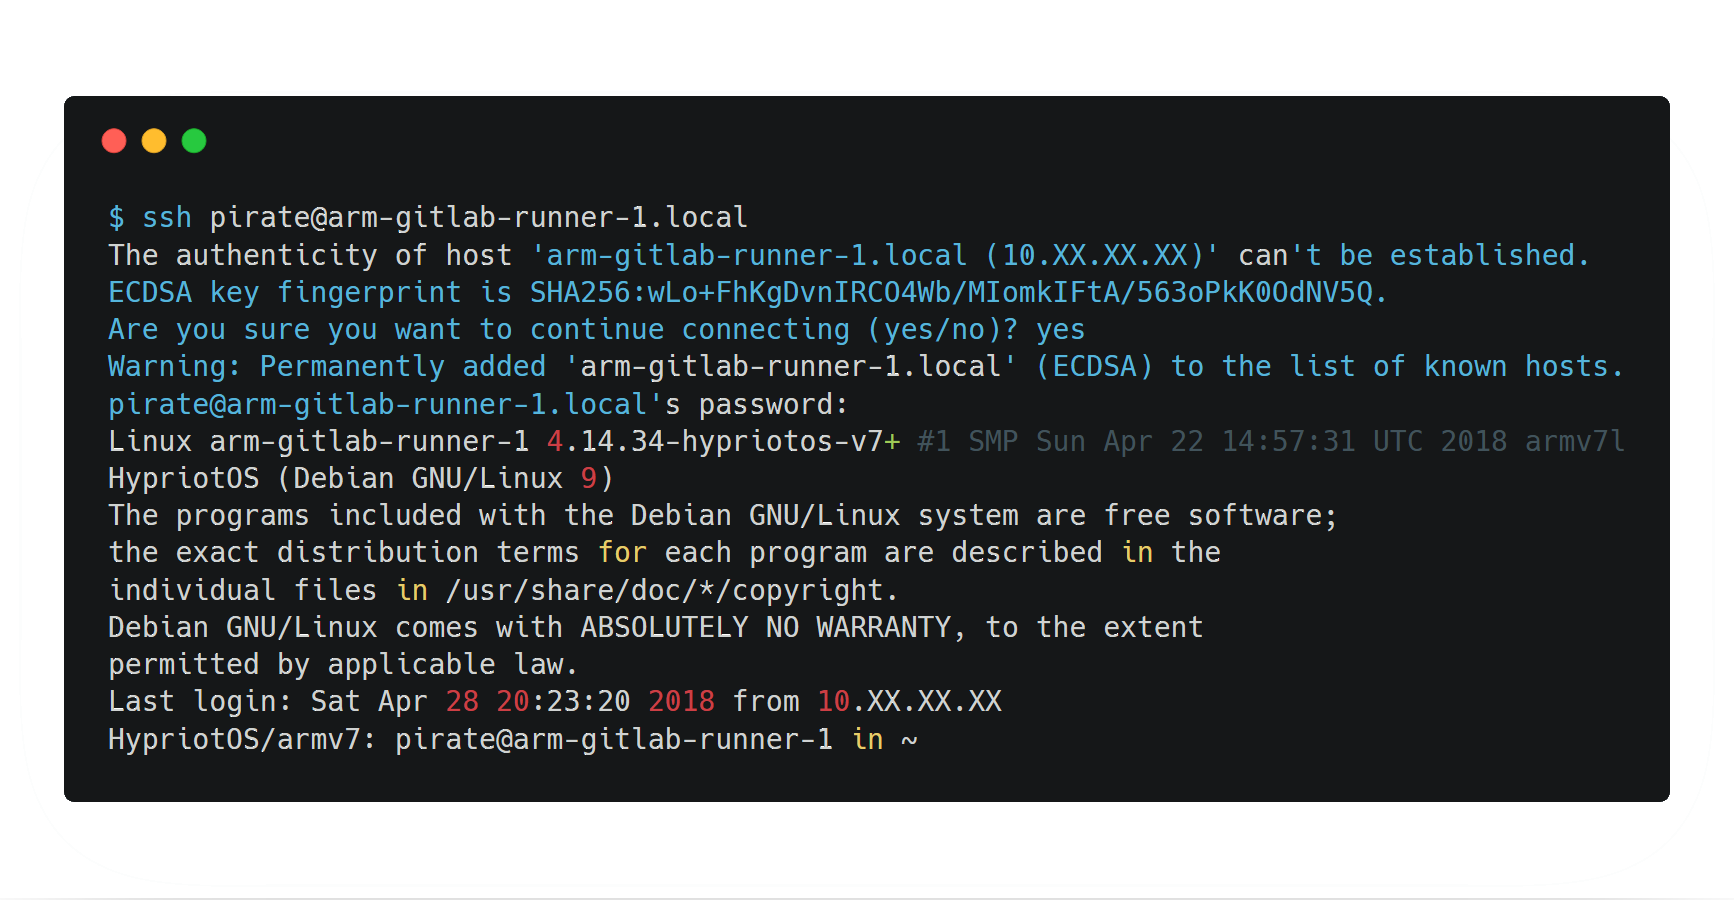
Machine name and user password
The default user “pirate” (password “hypriot”) can be changed or removed before the first boot. Everything happens in /boot/user-data. You can add your public SSH key, disable password logins and specify a different user account before booting your Raspberry Pi. WiFi can be customized and enabled to have Docker up and running through the air without attaching a keyboard and monitor. How cool is that?
You can also change the name of the machine later on with sudo raspi-config. The changes will have to be made in Network Options/hostname.
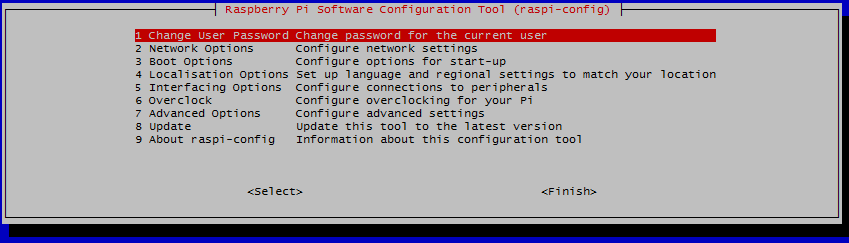
Once it’s done, reboot and enjoy your new machine name:
Proxy settings
If you’re like me, stuck behind a corporate proxy, you will have to set a few things before being able to update your machine and run Docker.
Package manager
Edit /etc/apt/apt.conf.d/10proxy and add your proxy (create it if it doesn’t exist yet):

https://gist.githubusercontent.com/gounthar/e3288a613845b18aee3fe1098422d59f/raw/2eb3c68c8f2b3473902763e2f2b22be79918eea6/acquire.txt
A sudo apt-get update should prove that the configuration is working

While you’re there, update the machine with sudo apt-get upgrade to have the freshest Docker environment available.
Docker
If you try to download a Docker image with docker pull … it will fail because Docker doesn’t use the same proxy settings as apt.
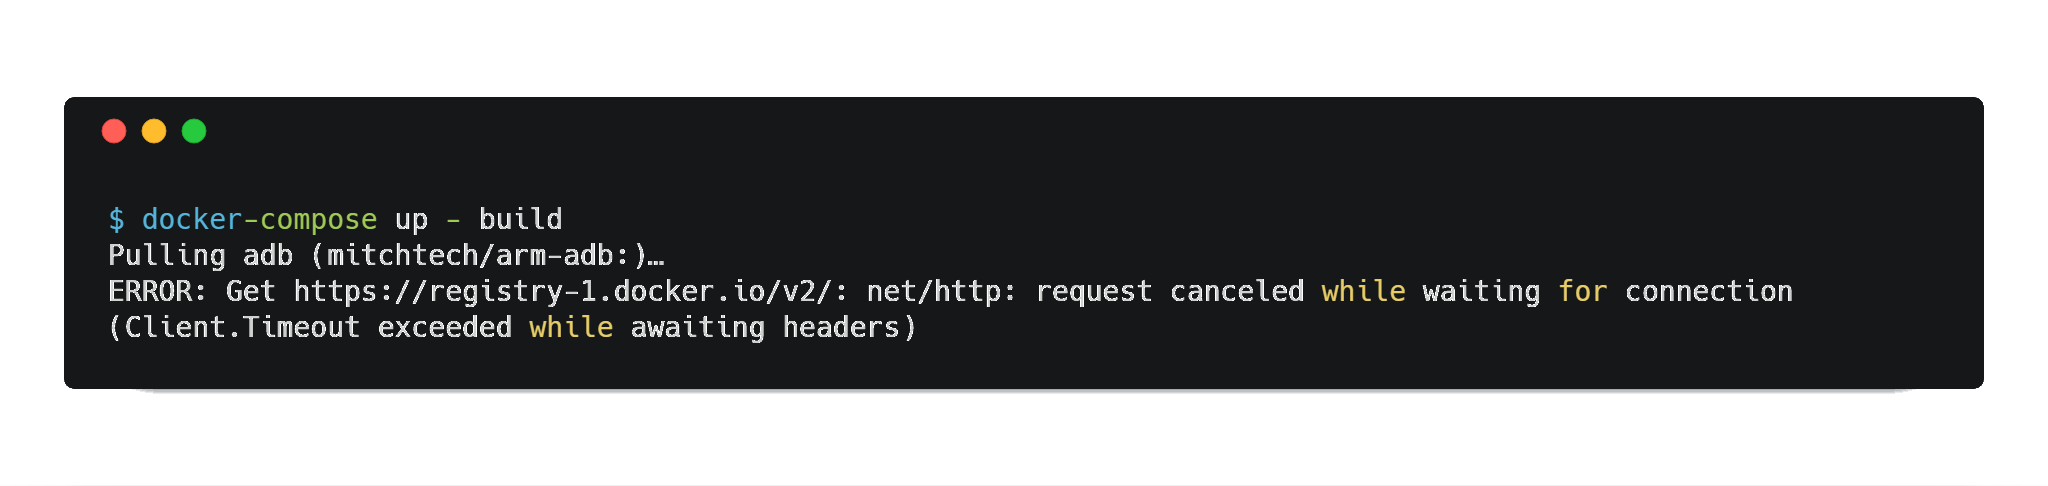
So you will have to create a few directories and files to let Docker know it should use your proxy:
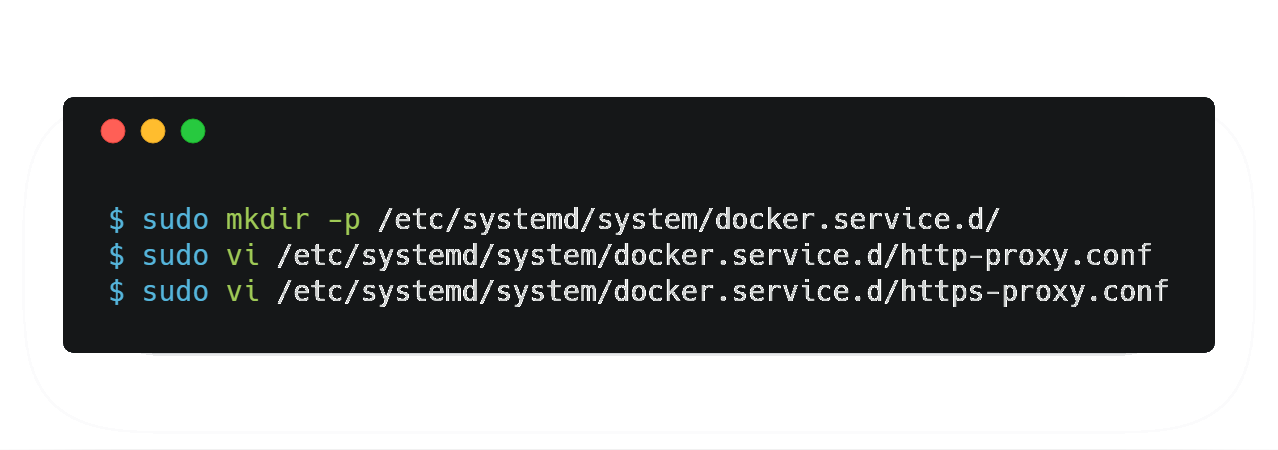
/etc/systemd/system/docker.service.d/https-proxy.conf will contain:
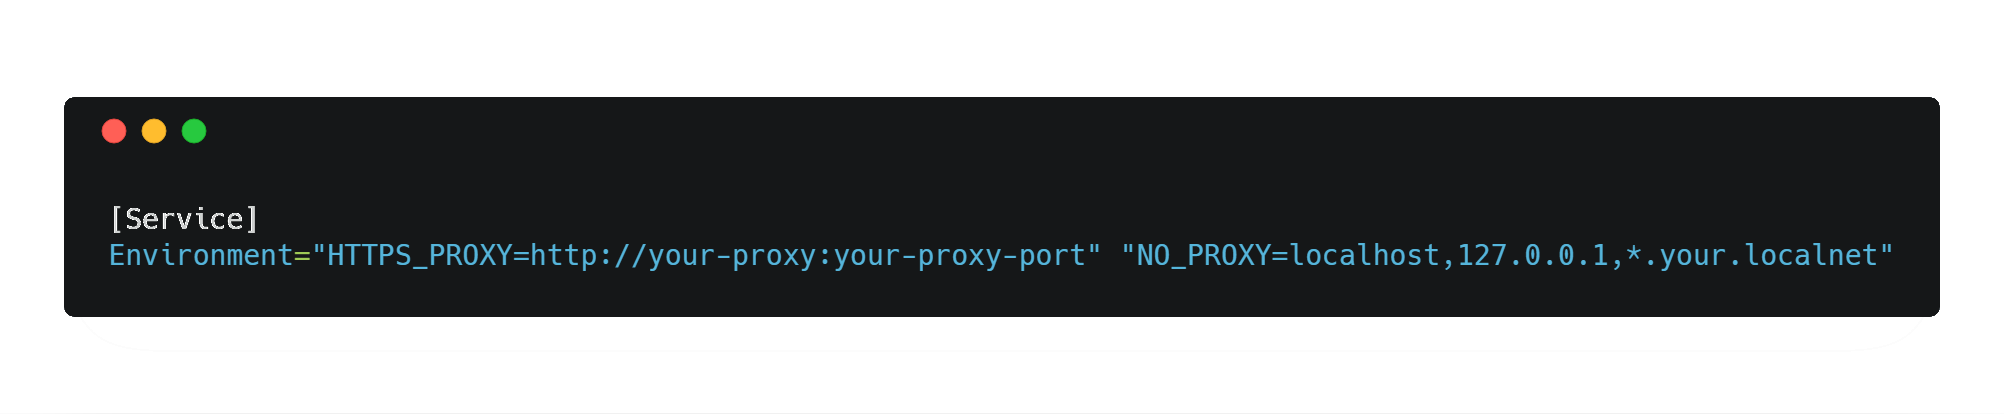
The http version of this file will have the same proxy settings (just remove the S of HTTPS).
Once you’re done with the modifications, you will have to tell Docker to restart to take this into account:
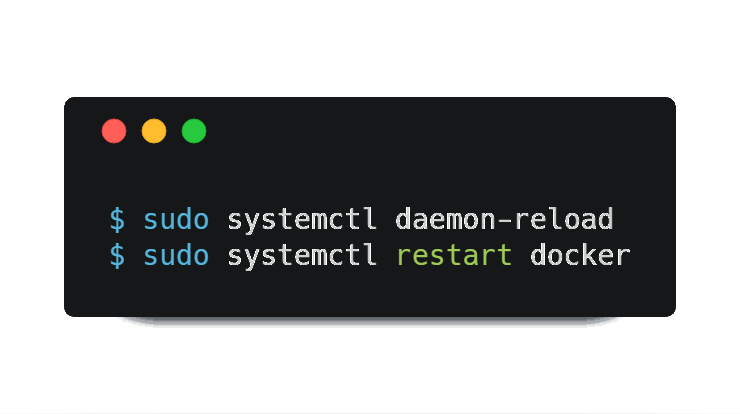
Then you’ll be able to check that your modifications are correct:
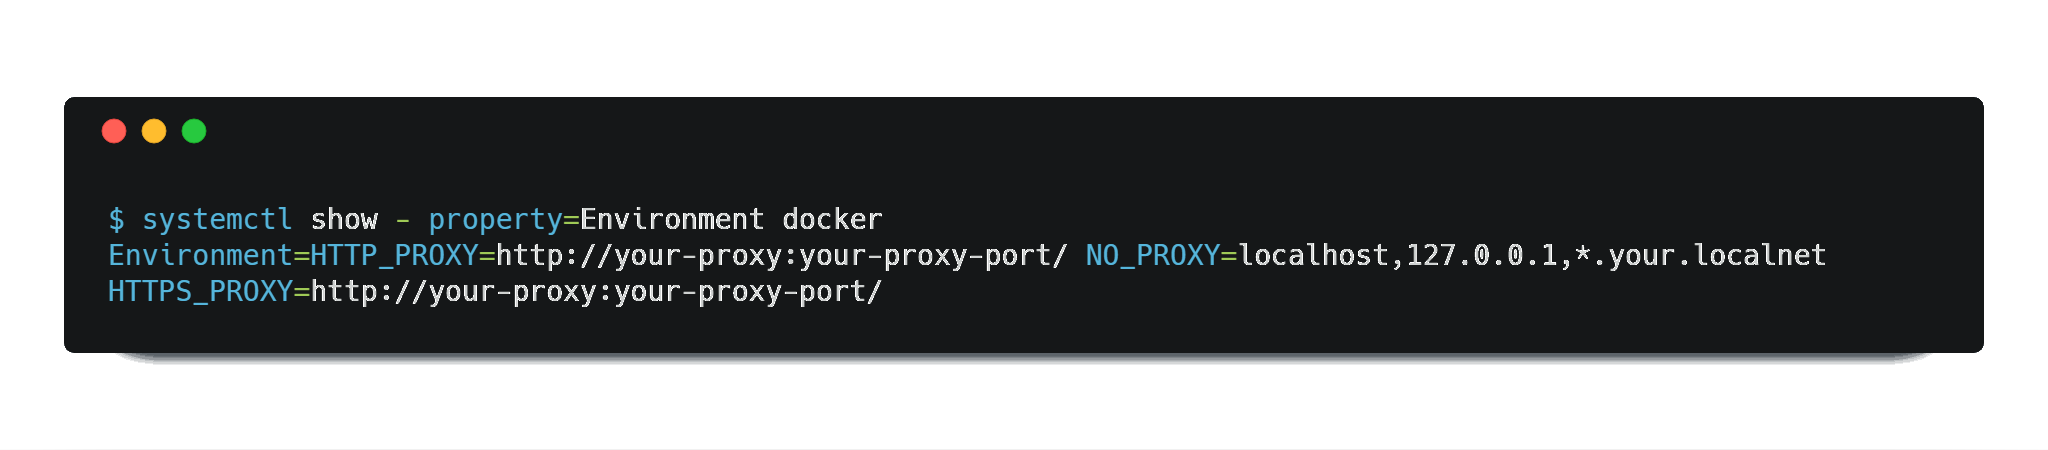
https://gist.githubusercontent.com/gounthar/2b1df86210ee515b1c074e7140d29b35/raw/bad834d6d2c23387ed8c5097fec0a52d29805056/properties.txt
Date
Check that the date on your machine is correct by issuing date in the terminal. If it’s not correct, you will have some troubles with getting a Docker image. So, if the date/time are not right, you can set them up with:

https://gist.githubusercontent.com/gounthar/ecc647cb01fe16bcd2f439d492b1e663/raw/15c97e75b7f8164a92f19dfb834fc9a6381fea9c/date.txt
Gitlab Runner
You already know Gitlab Runner, I’m sure you are already using some shared runners with your CI on your company’s gitlab. Most of the time, you don’t need to setup your own, but as there aren’t that many ARM gitlab runners for the time being… Gitlab Runner has been ported to ARM in 2017 by Mauricio Ugaz as it wasn’t available, and everyone needs gitlab-runner on Docker running on ARM, am I right?
Note: there are two versions available. Alpine and Ubuntu. As Alpine is the default image, when you run docker pull klud/gitlab-runner Alpine version will be downloaded.
About the image
This image is built for ARM devices, based on the official repo of the GitLab Runner. That’s a fantastic work that made my daily work really more enjoyable.
Overview
Runner container setup
You need to mount a volume into the gitlab-runner container in order to share the configuration. This could be done this way:

As we want to use the Docker executor, it is necessary to mount the Docker socket this way. Don’t forget to create /etc/gitlab-runner directory ahead of time:

Register runner
Once the container is up and running, you can then register the runner on your GitLab server. Go to your project on your Gitlab instance, click on Settings, then on CI/CD, and click on Expand next to Runner settings. Scroll down to Setup a specific Runner manually, and note the information regarding the URL and the token.
- Specify the following URL during the Runner setup: https://gitlab.com/.
Use the following registration token during setup: the_token_that_is_yours_and_yours_alone
So once you have the information you need (URL and token), you can then do this:
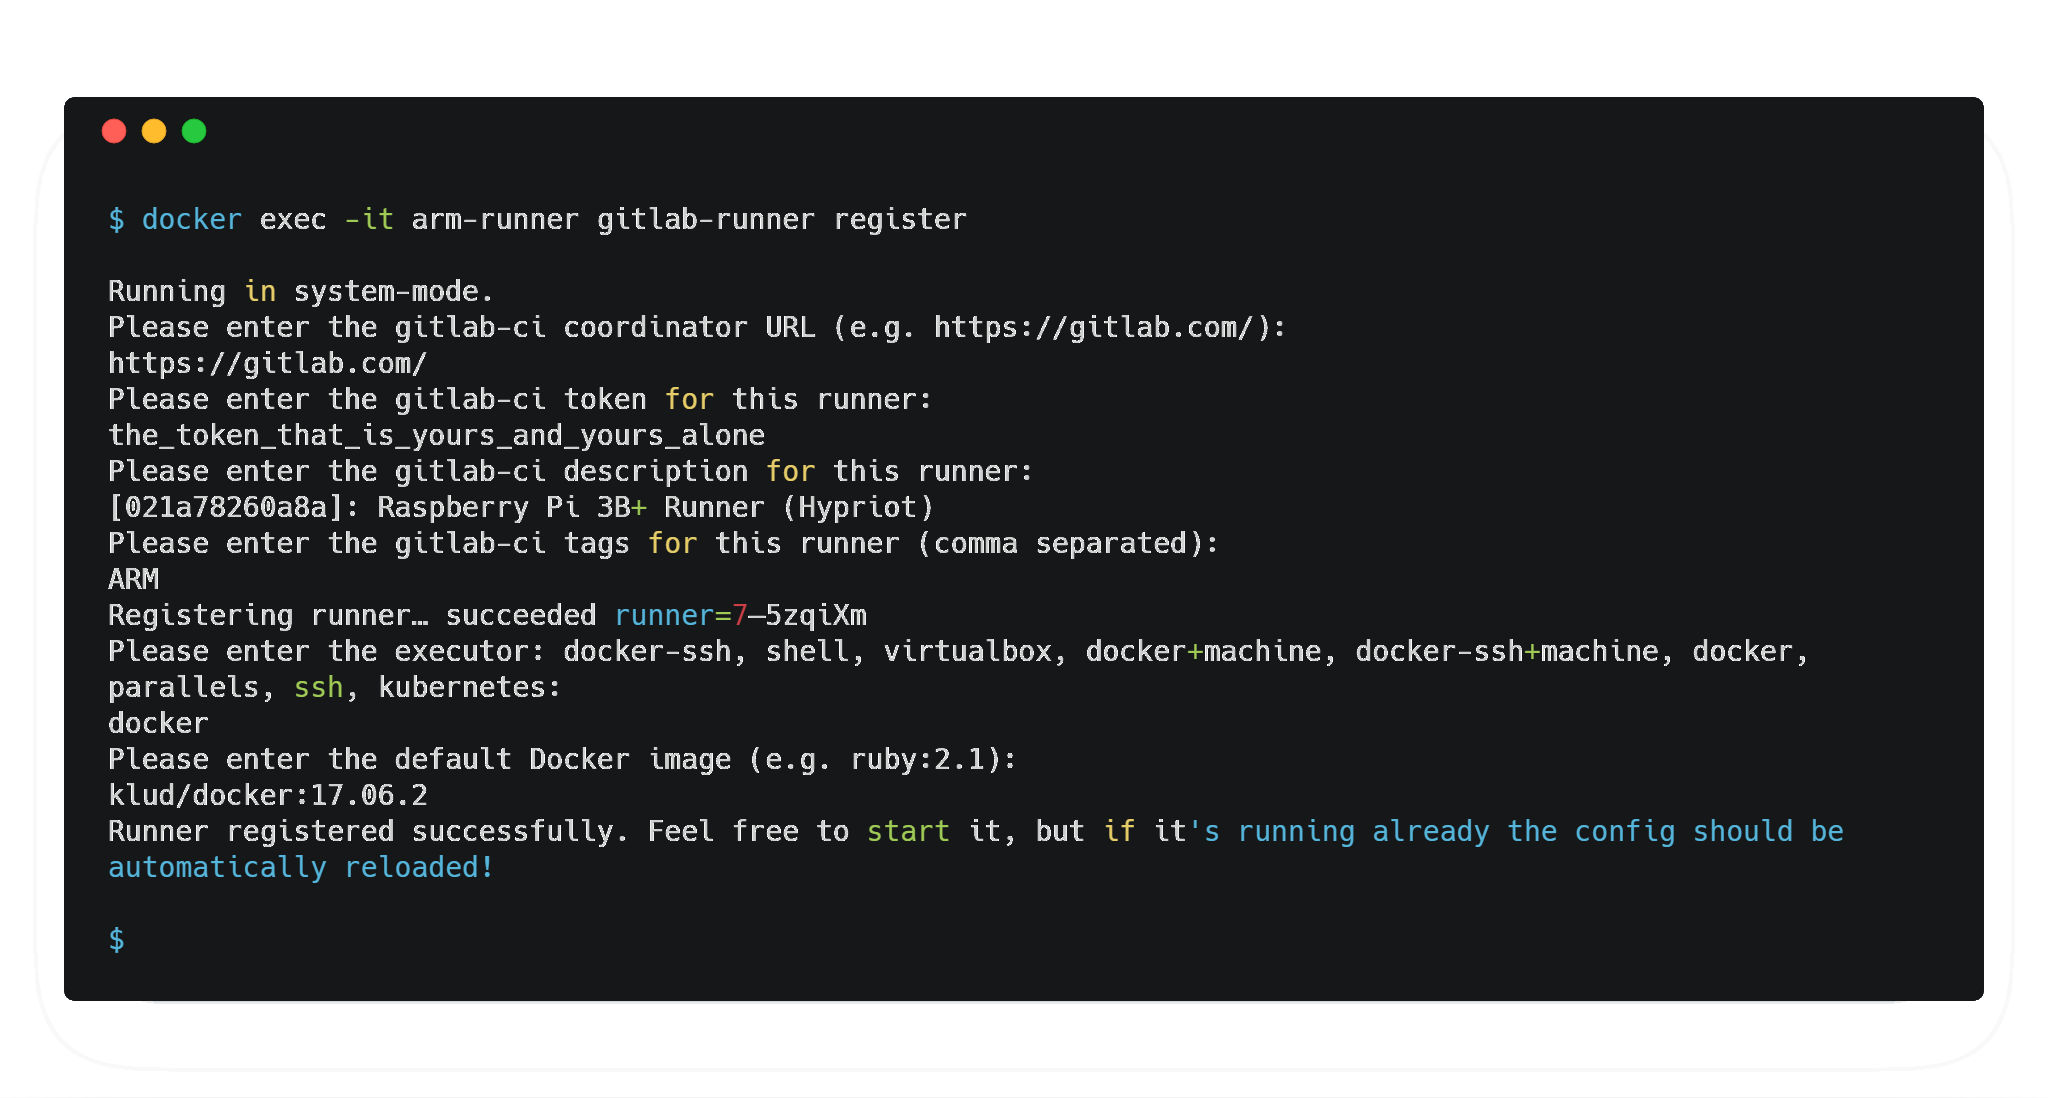
https://gist.githubusercontent.com/gounthar/968c840f9a5ef8ee98edfbd6d6154fff/raw/3ea52f940b92282d7fa97ebc5e8ab0ff3fb6219e/register.txt
Unfortunately, with the latest versions of Docker from 19.03, you may get this message.

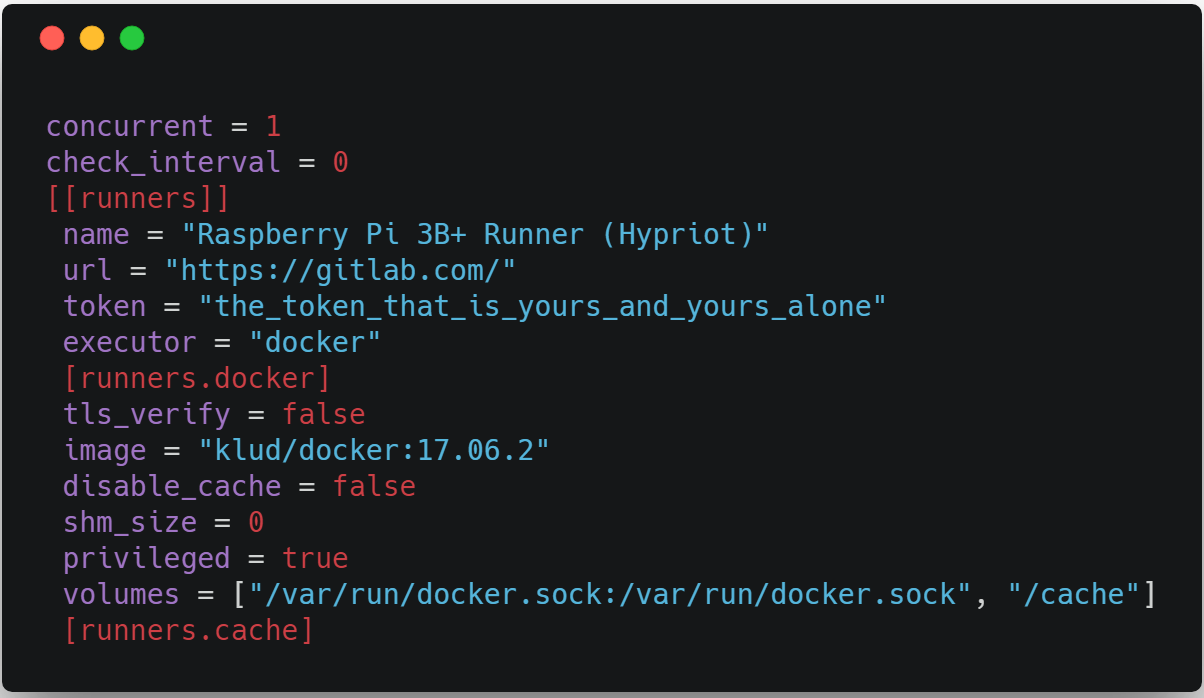
With Docker 19.03, TLS is enabled by default, to use TLS you need to update the GitLab Runner configuration so that the certificates are shared between the service and build container. To do this, update your config.toml so that it looks like that.

Let’s check if this new runner can now be seen. Refresh your CI/CI settings, expand Runner settings, and go down. You should now be able to see your brand new Gitlab-ci runner proudly sporting its ARM tag! 🤩
Congrats!
You could also do it this way:

So now you have your own ARM runner, ready to work.
Tip
For my case, I am using the standard image to build my Docker images with this Runner, and it works just fine. Dockerfiles and info about Docker in Docker images for ARM are here.
Troubleshooting
In case you’re using docker in docker in the runner, you may experience some issues

https://gist.githubusercontent.com/gounthar/7fd4ce41ebdd8b79bf7dfe2472af7119/raw/a3d0b0ff8891609078695ea60de0fc69e7d76fa0/daemon.txt
So in order to address this issue you need to look within the config folder you mounted in the runner container. There is a config file which is/etc/gitlab-runner/config.toml. You need to add two lines (regarding the privilegedand the volumes)and then restart the runner with docker restart arm-runner.
If you can’t find the file, it is maybe in ~/.runner/config.toml/; copy it in /etc/gitlab-runner after editing it and restart docker.
https://gist.githubusercontent.com/gounthar/31d41be5afb4b2c3ce0c66dfc1f00f33/raw/b08565f575646763ca3f71321a625e47f3c3619b/config.toml
So now you can enjoy your first ARM Gitlab build!

We now have an ARM machine sporting a recent kernel, running a recent version of gitlab-runner on top of a recent version of Docker.


We have reached the first level of achievement, having Gitlab runner running on the Pi thanks to Docker. Can we go any further? Could we build Docker images thanks to Gitlab runner on the Pi?
Building Docker Images
If you’re going to build images on this runner you can use the standard Docker image, as it is multi-arch now.
Just type docker at “Please enter the Docker image” in the first method or in --docker- image "image:tag" with the second method.
Sometimes, you may experience some troubles when using Docker in Docker.
So in order to address this issue you need to look within the config folder you mounted in the runner container.
There is a config file which is /etc/gitlab-runner/config.toml. You need to add two lines (regarding the privileged and the volumes)and then restart the runner with docker restart arm-runner.

If you can’t find the file, it is maybe in ~/.runner/config.toml/ copy it in /etc/gitlab-runner after editing it and restart docker.
It looks like we’ve reached the second level of achievement, being able to build Docker images through Gitlab runner.
What about another challenge?
Super tiny Runner
Let’s try it on another SBC, much, much cheaper, with half the amount of memory. This time, we’ll change fruit, let’s leave the raspberry aside and try with an Orange… Do you think it could work?
The Orange Pi Zero is one of my preferred SBCs, and almost the cheapest to this date.

You’ll get if for about 9€, and it can run Docker with a very recent kernel thanks to the Armbian distro. This distro is a fantastic community project which allows lots of SBCs to run recent Linux kernels with optimizations.

Armbian is a lightweight Debian based distribution specialized for ARM developing boards. It’s Compiled from scratch, It has powerful build and software development tools, and a vibrant community to boot. It supports lots of chips like the Allwinner H2+, H3, H5, Amlogic S905, Rockchip RK3288 and RK3399, Samsung Exynos 5422… If we go to the download section you can see there are tons of different cards that can run Armbian.
It you choose OrangePi zero, you can see the specifications.
One of them is Docker, which means you can run Docker on this board with Armbian.
Yes, you can run Docker on a 512MB ARM machine. You can even run gitlab runner on Docker on it. And even Docker on gitlab runner on Docker on it… Il you click on Docker, you will then be able to see the list of SBCs able to run Docker with Armbian.
Impressive, isn’t it?
Docker does not come preinstalled with Armbian, so you have to install it like that.
 Note that you could get Docker preinstalled, as you can build this distro by yourself as long as you have an Ubuntu machine available.
The rest of the commands to run gitlab runner are strictly the same than for Raspberry Pi, so no need to repeat them.
Let’s just have a look at the result, once the runner has been installed, registered and started.
Feel like taking a look ?
Note that you could get Docker preinstalled, as you can build this distro by yourself as long as you have an Ubuntu machine available.
The rest of the commands to run gitlab runner are strictly the same than for Raspberry Pi, so no need to repeat them.
Let’s just have a look at the result, once the runner has been installed, registered and started.
Feel like taking a look ?

Here is a build of a Docker image on an Orange Pi Zero. Isn’t it fantastic? We reached the third level of Achievement…
64 bits Runner
Some of the boards handled by Armbian or HypriotOS are ARM64 also called aarch64, or ARMV8. To tell you the truth, even the Raspberry Pi 3B is aarch64… It’s just that Raspbian does not handle it for compatibility reasons with their older boards. You can find 64 bits distros for the Raspberry Pi, like ArchLinux, DietPi, Hypriot… For other cards, Armbian does exist for ARM64, so does Docker. Until 10 months ago, we were kind of stuck, as gitlab-runner for aarch64 did not exist
The merge request had been running for almost 3 years until it got accepted. We are now able to use gitlab-runner on our 64 bits ARM machine, and without using Mauricio Ugaz fork, just the standard Docker image directly supplied by gitlab.
To sum up, we managed to setup a gitlab-ci Runner on a Raspberry Pi, and then on an OrangePi Zero . You now know how to transform your dusty Raspi into a gitlab- runner, even able to build Docker images. In the company I work for, we have also installed it on other SBCs (Odroid XU4, Nano Pi Fire3 ), and on a ThunderX2 just for fun. We are using them everyday, as they are cheap, disposable, fun to use, and have a very small footprint, so that we install them just about anywhere. I hope to have tickled your curiosity regarding these little beasts called SBCs, and that some of you will join the peaceful ARM rebellion.